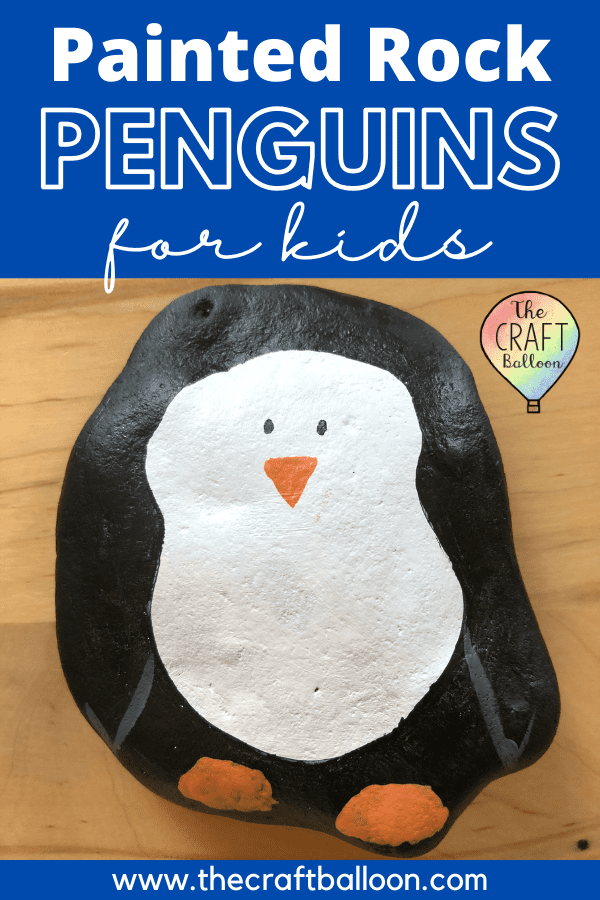
Painted rock penguin

A step-by-step guide to painting a cute penguin rock. A simple design, perfect for kids to try at home.
To say that penguins are popular with us would be an understatement. Believe me when I say that, in our house, penguins are big.
Today we’ve combined our love of penguins with something else that we really love. Something that we enjoy collecting on walks and at the beach – rocks.
Yes, today, we give you…. painted rock penguins!
Painting rocks is a lot of fun, and my kids and I also find it very relaxing (it’s a great quiet activity for a rain or snow day when you’re stuck inside).
The penguin design we’ve done here is simple and pretty straightforward for children to have a go at.
(If your child branches off and goes for a slightly different design or adds some extra details along the way, like mine did, that’s okay too. Penguins comes in many forms!)
I hope this post give you some ideas for doing painted rock penguins with your kids at home.
Read on for our how-to instructions and pictures.
What you will need
- Rocks to paint (more details in a minute)
- Paint (black, white, orange)
- Black sharpie
The rocks
First a quick note about the rocks.
Given that this is rock painting for kids, bigger rocks will be much easier for your child to paint and to add details to than smaller rocks.
The rocks we used ranged from roughly about 2×2 inches to about 3×4 inches. If your rocks are too tiny, it will be tricky to fit all the details on.
Ideally, if you can also find flattish rocks, these are much easier to paint on too.
Although penguins are tall and thin in shape, our penguins ended up being pretty round as those were the rocks we happened to have. We decided that for our painted penguins, it didn’t really matter about the shape of the rock because the finished penguins looked super sweet in all their various shapes and sizes.
Paints
For our penguins we used acrylic paints. They’re thick enough that they cover the stone well and they dry pretty fast too which is great.
I really like acrylics for a number of reasons. They are pretty forgiving (you can paint over mistakes!), you can blend colours as you paint, and you can get them in lots of different finishes (satin, metallic etc).
For painting with kids, make sure you use a paint that is non-toxic. Also be aware that this type of paint does not wash out of clothes easily, so make sure you cover up with a painting smock or the equivalent.
There are lots of different brands of acrylics in the craft stores and I would recommend experimenting with different ones as they vary a little in terms of coverage and how runny they are.
Mostly, the paints covered well with one coat. The only time when you might need to do two coats is with the white paint in step 1 below.
Okay, enough about paints and rocks, let’s get cracking!
How to create your painted rock penguin, step by step
Step 1
To begin, paint the front of your rock with white paint (this will be the penguin’s white feathers at the front).
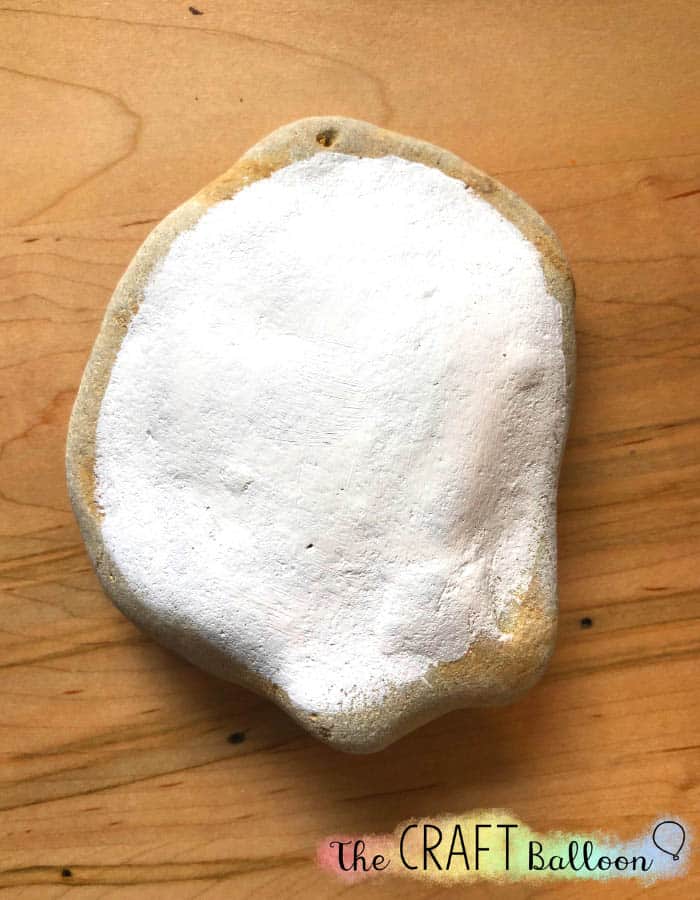
You don’t need the paint to go all the way to the edges and you’ll be painting those bits black shortly.
We did two coats of white to completely cover the rock. It only took about 5 minutes for the first thin coat to dry.
Important! Let the white paint dry properly before you move to the next step (otherwise your black and white paints will mix and go grey!)
Step 2
Next, turn your rock over and paint the back of the rock black.

Again, let the paint dry thoroughly before flipping the rock back over for step 3.
Step 3
Next, take your black sharpie and draw an hourglass-type shape on the white front of the penguin.

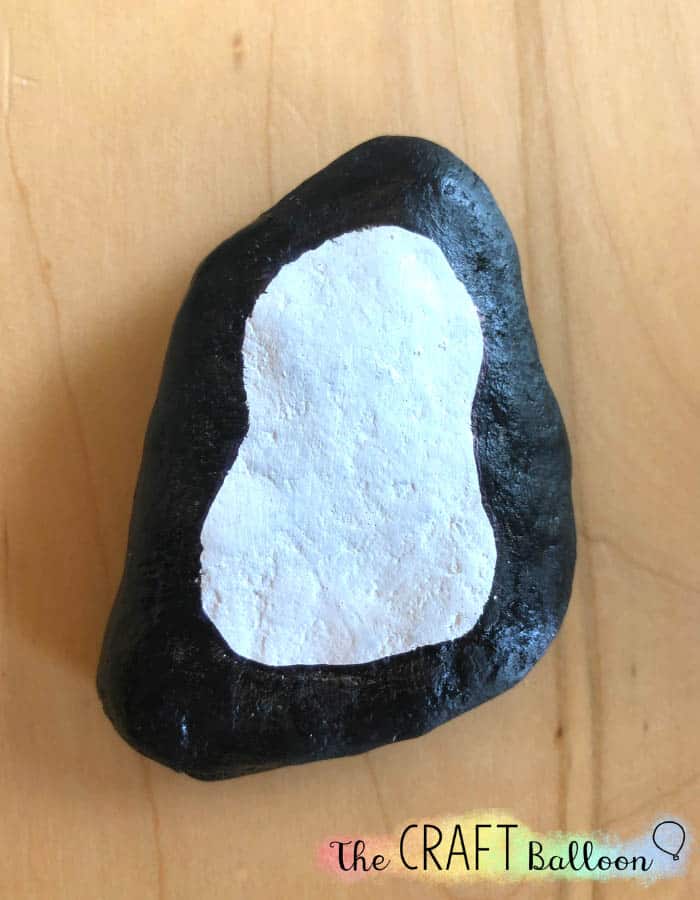
Step 4
Next, using the black paint again, paint up to (but not over) the black line you have drawn with the sharpie.
When finished, your penguin rock should look a bit like this:
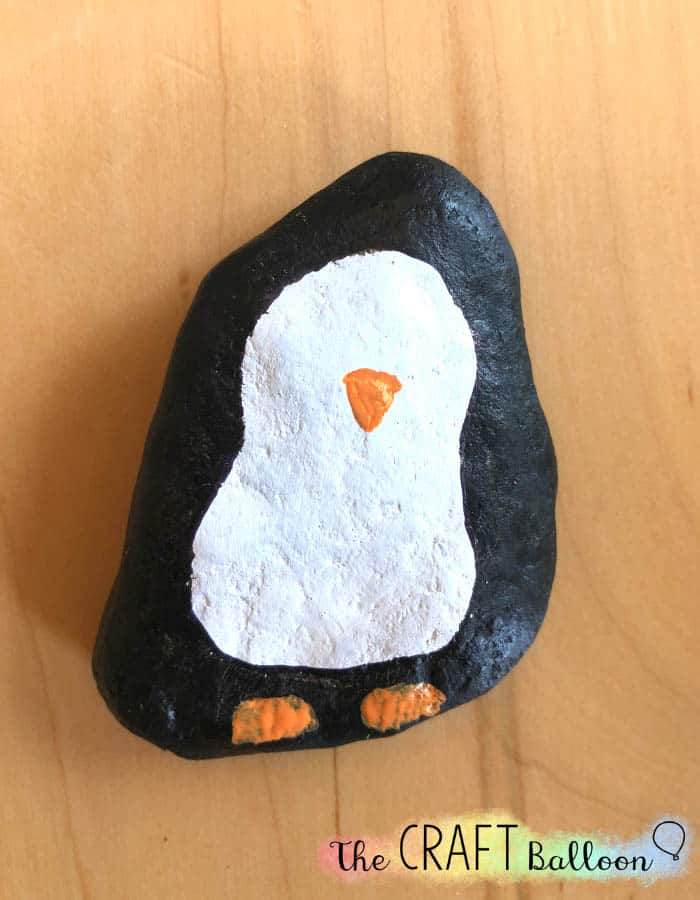
Step 5
Next you’ll need the orange paint and ideally a small, fine brush.
Over the black paint at the bottom of the rock, paint on two orange oval shapes for the penguin’s feet/flippers.
Depending on your paint, you may need to do a second coat of orange to cover the black.
And then, using the smallest brush you have, draw a orange triangle for the beak.
Step 6
The final stage now is to add a couple of small details.
With a grey paint (mix the black and white) and a thin brush, we added lines for the penguin’s wings (almost like a checkmark shape).
Lastly, using a fine sharpie, we added two black marks for the penguin’s eyes. (The sharpie works best here are they only need to be small marks.)
And your finished penguin may look something like this:

If you have more rocks on hand, encourage your child to paint a few more penguins and make a penguin family!

These are lovely on display or they also make a very sweet homemade gift for family or friends.
Whatever you do with them, I hope you enjoyed this post and your child enjoys getting creative painting their penguin rocks. Thanks for reading and catch you next time.
If you like this painted rock penguin post, why not pin it? Thanks for your help!